
Your first plan
Everything is saved automatically, so you can leave at any point and pick up where you left off.
Before you start
Devices with an area (room) in Home Assistant can be auto-placed next to their room; areas on floors let each floor plan offer only its own devices. Neither is needed to place devices by hand. See Install → Before you start.
1. Open the planner
Open Floorplan Editor in the sidebar. The first time, a short intro explains the four steps. Press Add your first plan, or Try a sample plan if you just want to look around (← Back to the intro takes you back).
2. Create the plan
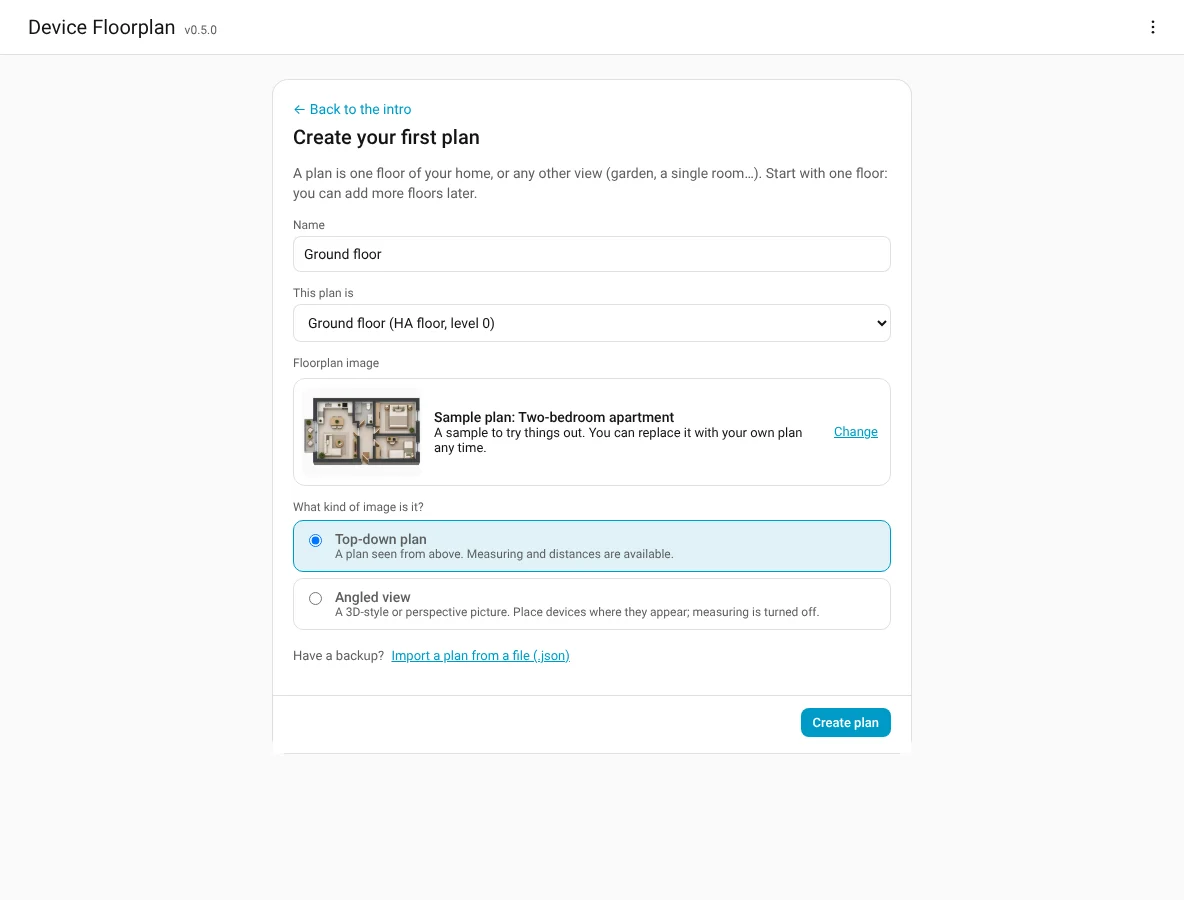
- Name: usually the floor, e.g. Ground floor.
- This plan is: pick the matching Home Assistant floor. Devices whose area is on that floor are offered for this plan. You can also choose a level number, or Not a floor for a free view such as the garden.
- Floorplan image: drop a picture, choose one already in Home Assistant, or pick a sample plan. See Choosing an image.
- What kind of image is it? Top-down plan (measuring available) or Angled view (a 3D-style picture; measuring is off).
Press Create plan. You can add more floors later.
3. Choose which devices go on the plan
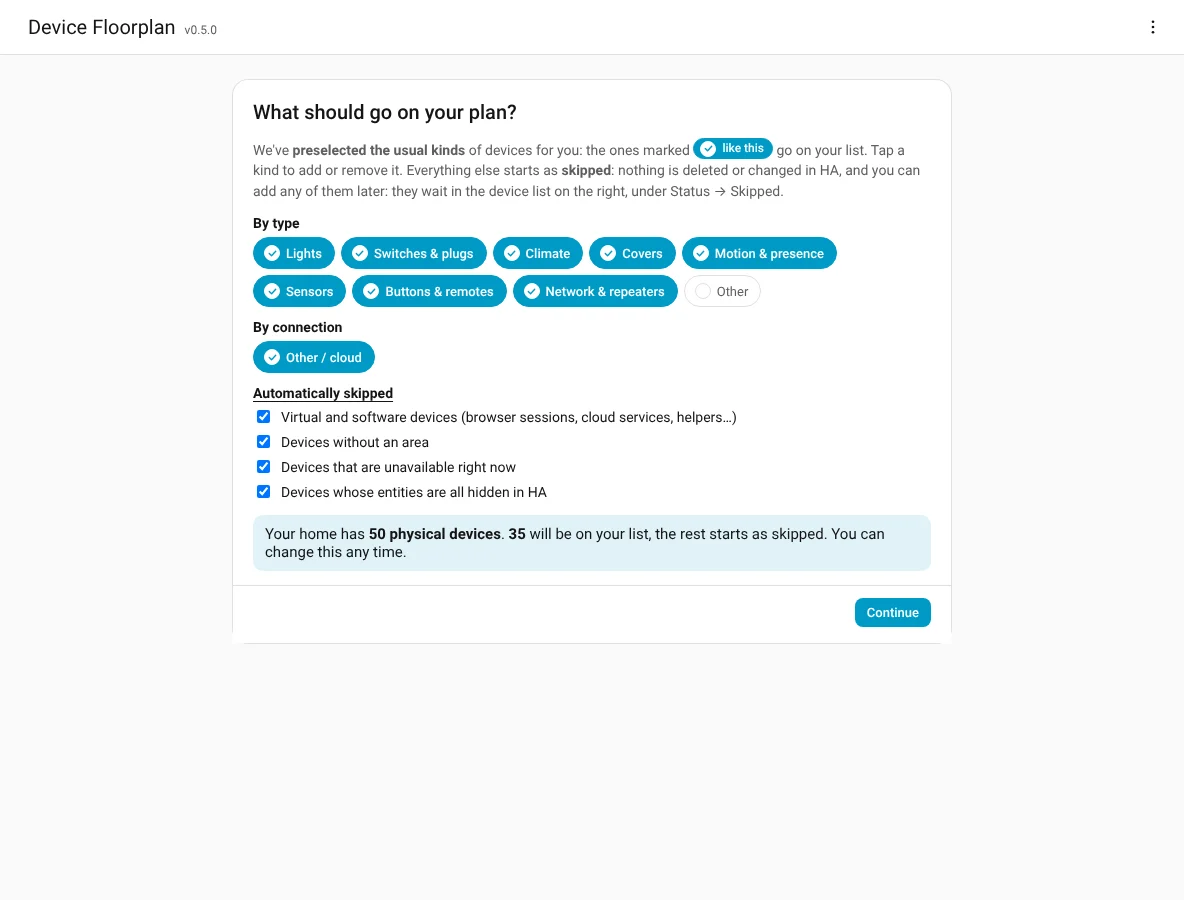
The usual kinds of devices are preselected (they have a ✓). Tap a kind to add or remove it. Everything else starts as skipped: nothing is deleted or changed in Home Assistant, and you can add any skipped device later.
The line at the bottom tells you how many devices will be on your list. Press Continue.
4. Follow the three steps
The green guide box tells you what to do in each step:
- Measure (optional): give the plan a real scale.
- Mark rooms: drop a pin in each room.
- Place devices: Auto-place, then drag devices to their spot.
5. Put it on a dashboard
As soon as the first device is on the plan, ✓ I'm ready appears at the top. Press it to see what was created and to add the plan to a dashboard.